Remember: if you have any concerns about any of the steps you can contact your healthcare team using the numbers in your carer diary.
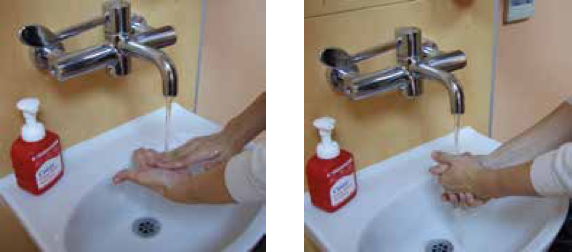
Step 1Wash your hands with soap and water and dry well.
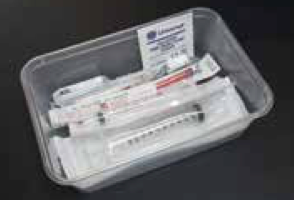
Step 2Assemble the equipment in a clean container.
You will need:
- Medication(s) ampoule(s) as well as normal saline for flushing.
- Luer-lock syringes.
- Blunt filter drawing up needle(s).
- Alcohol wipe (optional).
- Sharps Container.
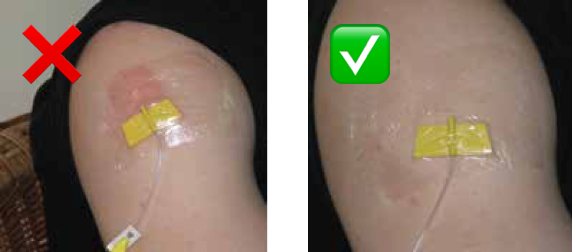
Step 3Check the injection site for:
- Redness.
- Tenderness.
- Swelling.
- Leakage.
Step 4Attach the blunt drawing up needle to the Luer-lock syringe.
- Take the syringe out of the packet.
- Put the needle onto the syringe using a twisting action until secure.
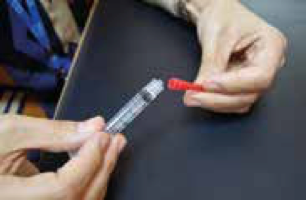
Step 5Open the plastic or glass ampoule.
Step 6Drawing up medication from an ampoule
- Place the ampoule in a position that is comfortable for you, such as on a table, or turn the ampoule upside down. The medication should not come out of the ampoule when turned upside down.
- Insert the needle into the ampoule
- Draw up the medication by slowly pulling back on the plunger of the syringe.
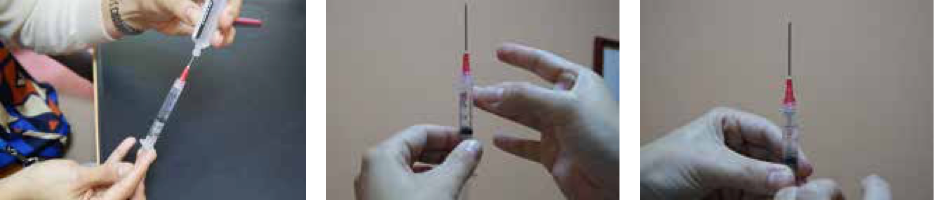
- Once the medication is removed from the ampoule, hold the syringe with the needle pointing upright.
- Flick the syringe with your finger to get all air bubbles to the top, then push the plunger up to expel the air bubbles from the syringe.
- Slowly push the plunger of the syringe upwards until you have the correct dose/amount as instructed by the doctor/nurse.
- Dispose of the ampoule directly into the sharps container.
Step 7Give the injection into the cannula
- Take the prepared syringe(s) and normal saline flush in a clean container to the person.
- Remove the blunt filter drawing up needle and dispose of it in the sharps container.
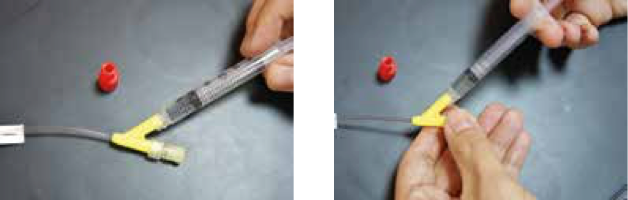
- Next pick up the cannula, and push the syringe into the blue/yellow area (see picture), using a twisting or screwing motion until the syringe is securely attached to the cannula.
- Slowly push the plunger of the syringe until the barrel is empty.
- Remove the syringe, use a twisting motion to unscrew the syringe.
- Place syringe in bin.
- Repeat the process with 0.5mls of normal saline after all medications have been given to flush the line.
Step 8Check the injection site for:
- Redness.
- Tenderness.
- Swelling.
- Leakage.
Step 9Record the medication(s) given in the carer diary and check later that they have worked.
Step 10Safe storage and disposal of medication(s):
- Store medication(s) in a container in a cool place away from children and away from the view of the general public.
- Store sharps container out of reach as directed by your nurse.
- It is important to dispose safely of unused medication(s). Return unused medication(s) to your local pharmacist when they are no longer required.
